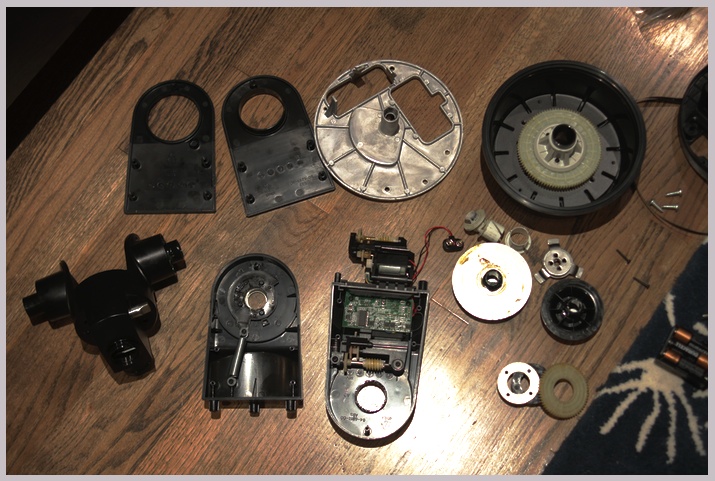

Tonight I finally got back to working on the conversion of my telescope into a remote control pan and tilt mount for my DSLR.
Last time I disassembled just the optical part of the telescope but was reluctant to go much further because of the cost. I decided that perhaps I should just mount the camera on top of the telescope tube altogether so that I can use it as both a pan and tilt for my camera as well as a telescope.
The only problem was that for some reason the tilt feature wasn’t working so well anymore. It appeared to me that the only way the tilt gear was engaging with the brackets for the telescope was by the mere pressure from tightening the knobs on the sides. I felt like this wasn’t such a good method for the possibly heavy camera rig I’m going to mount on top.
I want a way to physically lock the tilt gear to the brackets so that I can feel confident it will handle the weight of my rig. I will definitely counterweight the camera so that its balanced and easier to move but I still feel like the gear should be lockable. If I did lock the gear to the bracket I would no longer have the ability to tilt the telescope by hand. I would always have to use the motor but I feel like this is not such a major sacrifice.
So, the only way to discover how to accomplish this was to completely dismantle the telescope altogether, from top to bottom. I’m glad I did it because now I’ve demystified it. I feel pretty confident that I’ll be able to use this telescope for both purposes.
It certainly was a long and confusing process getting into this sucker. I felt like I was solving some cryptic egyptian locking mechanism every step of the way.
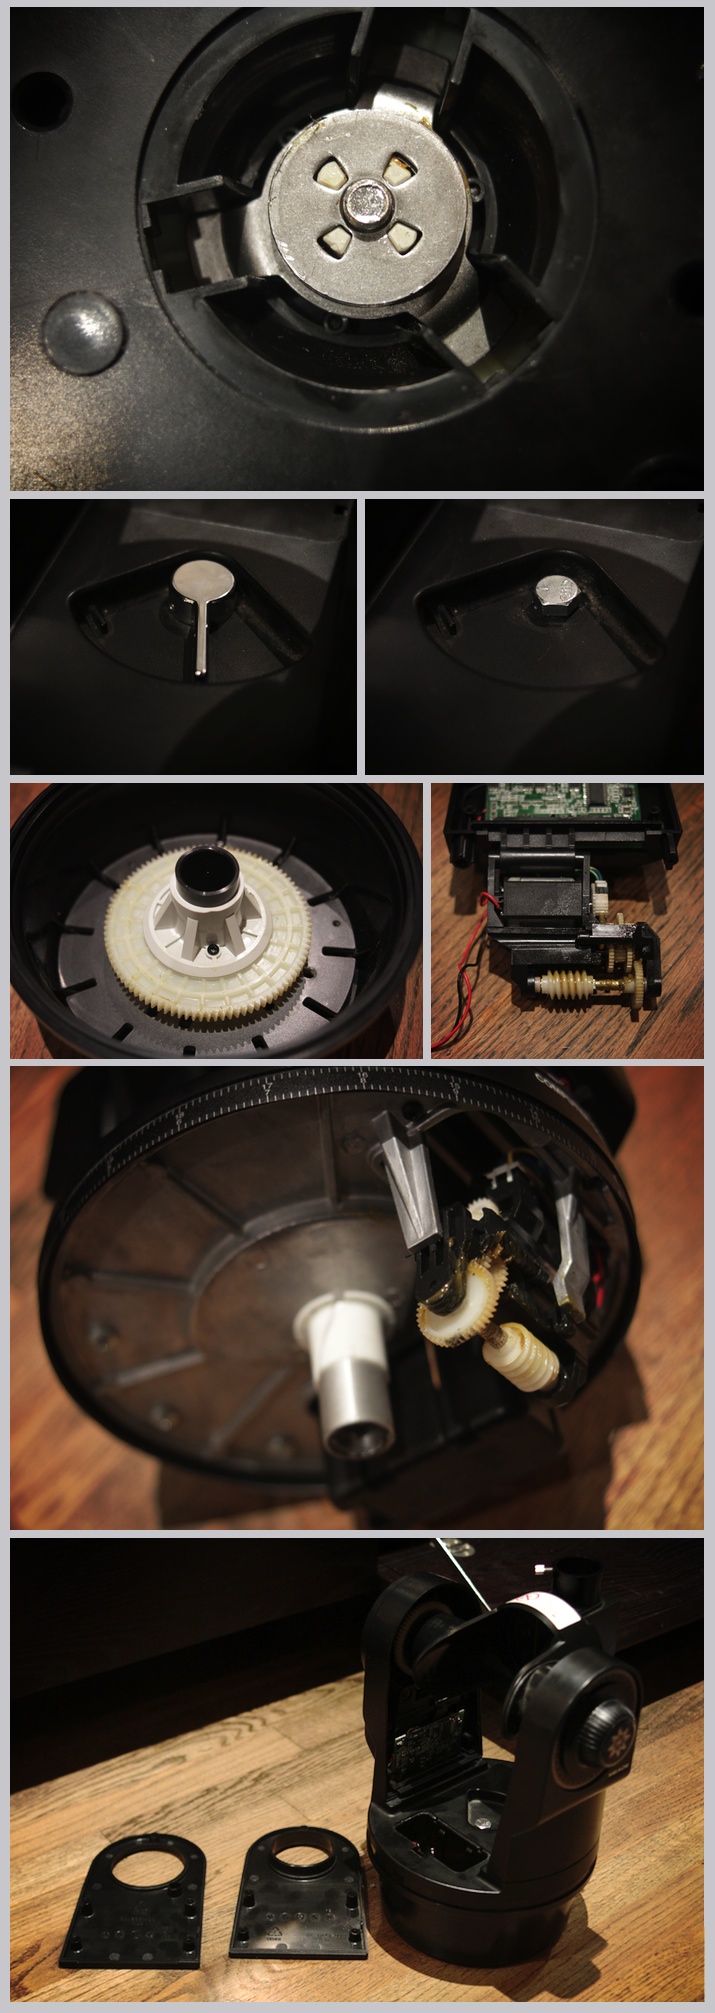
Step one was removing the screws from the bottom. This did nothing but loosen a metal plate inside that didn’t need to be loosened in the first place. Then, under a plastic cover on the bottom, I found the next strange connector. It was an odd metal washer that could not be turned.
The solution came when I looked at the base from the top. There is a lever which allows you to lock the panning position into place. This lever was directly connected to the strange washer below. I looked closely at the lever and saw that it was holding on by a very small allen wrench connection. I got the smallest allen wrench I could find and loosened the lever off. Underneath was the bolt. I twisted the bolt off and in turn released the odd washer below. Under the strange washer was another very tight nylon fitting. I was able to unscrew that off with a pair of channel locks.
Finally, I was getting somewhere. The rest of the dismantling went smoother. I got to see up close and personal how everything was connected inside.
I’m happy to say that I was also successful in re-assembling everything back together again. Now I know how to go in and out of this guy for future modifications.
My plan now is to attach the tilt gear to the bracket using some kind of rubber cement or strong adhesive. Then designing and creating a mount for my camera that I can then strap onto my telescopes tube.
Hopefully I can get to it soon. I’m looking forward to recording some footage with this guy.
Comments
2 responses to “Day 285 / A Complete Dismantle”
[…] rain sort of kept me indoors and swayed me from working on my telescope to pan & tilt conversion, although I did swing by the hardware store to prepare for it. I did, however, have the music […]
[…] by the imagery outdoors. I didn’t have the energy to set-up my garage for working on the telescope project but I did feel the urge to go out and capture some of this beautiful imagery. I didn’t want to […]